Advertisements
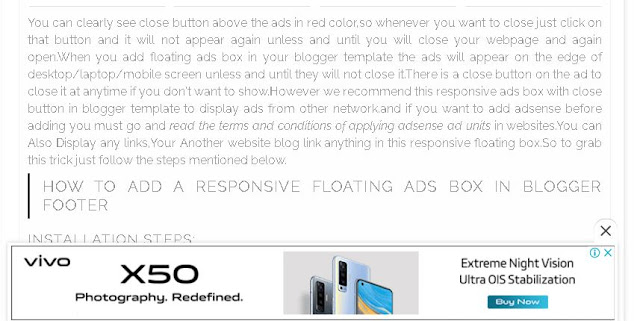
These are the Steps by which you can use and Add Fixed Responsive Floating AdSense Box In your blogger footer Area.
1. Go to your www.blogger.com
2. Select your blog in which you want to Open all Internal or External Links in New Tab3. Click on Theme from Left Menu.
4. Click on Backup/Restore your template before doing any Changes.
5. Click on three dots (...) near my theme.
6. Click Any Where on the Code And Press (Ctrl + F) to find </head> tag in HTML.
7. Above the </head> paste the following CSS code.
5. Click on three dots (...) near my theme.
6. Click Any Where on the Code And Press (Ctrl + F) to find </head> tag in HTML.
7. Above the </head> paste the following CSS code.
<!-- sticky begins -->
| <style> | |
| /*<![CDATA[*/ | |
| .sticky-ad { | |
| display: -webkit-box; | |
| display: -ms-flexbox; | |
| display: flex; | |
| -webkit-box-orient: vertical; | |
| -webkit-box-direction: normal; | |
| -ms-flex-direction: column; | |
| flex-direction: column; | |
| -webkit-box-align: center; | |
| -ms-flex-align: center; | |
| align-items: center; | |
| -webkit-box-pack: center; | |
| -ms-flex-pack: center; | |
| justify-content: center; | |
| overflow: visible; | |
| position: fixed; | |
| text-align: center; | |
| bottom: -104px; | |
| width: 100%; | |
| max-width:736px; | |
| margin-left:-543px; | |
| left:50%; | |
| z-index: 999; | |
| max-height: 104px; | |
| background-image: none; | |
| background-color: #fff; | |
| box-shadow: 0 0 5px 0 rgba(0, 0, 0, 0.2); | |
| margin-bottom: 0; | |
| padding: 4px 4px 0; | |
| transition: all .4s ease-in-out; | |
| } | |
| .sticky-ad-close-button { | |
| position: absolute; | |
| width: 28px; | |
| height: 28px; | |
| top: -28px; | |
| right: 0; | |
| background-image: url("data:image/svg+xml;charset=utf8,%3csvg width='13' height='13' viewBox='341 8 13 13' xmlns='http://www.w3.org/2000/svg' xmlns:xlink='http://www.w3.org/1999/xlink'%3e%3cg%3e%3cpath style='fill:%234F4F4F' d='M354 9.31L352.69 8l-5.19 5.19L342.31 8 341 9.31l5.19 5.19-5.19 5.19 1.31 1.31 5.19-5.19 5.19 5.19 1.31-1.31-5.19-5.19z'%3e%3c/path%3e%3c/g%3e%3c/svg%3e"); | |
| background-size: 13px 13px; | |
| background-position: center; | |
| background-color: #fff; | |
| background-repeat: no-repeat; | |
| box-shadow: 0 -1px 1px 0 rgba(0, 0, 0, 0.2); | |
| border: none; | |
| border-radius: 12px 12px 0 0; | |
| cursor: pointer; | |
| } | |
| .sticky-ad-close-button:before { | |
| position: absolute; | |
| content: ""; | |
| top: -20px; | |
| right: 0; | |
| left: -20px; | |
| bottom: 0; | |
| } | |
| * { | |
| -moz-box-sizing: border-box; | |
| -webkit-box-sizing: border-box; | |
| box-sizing: border-box; | |
| } | |
| :active, | |
| :focus { | |
| outline: 0 | |
| } | |
| @media screen and (max-width:800px){.sticky-ad{margin-left:0;left:0}.sticky-ad-close-button{background-position:9px;border-radius:12px 0 0 0;}} | |
| /*]]>*/ | |
| </style> | |
| <!-- stickyends --> |
8. Click click again Any Where on the Template Code And Press (Ctrl + F) to find </body> tag in HTML.
9. Above the </body> paste the following code.
9. Above the </body> paste the following code.
<!-- Stickybody -->
| <div class='sticky-ad' id='sticky-ad'> | |
| <!-- The ad code for desktop please save below --> | |
| <div align='center'> | |
| <!-- Stickyad1 --> | |
| <ins class="adsbygoogle" | |
| style="display:inline-block;width:728px;height:90px" | |
| Put Assense ID Here | |
| data-ad-slot="2959851744"></ins> | |
| <script> | |
| (adsbygoogle = window.adsbygoogle || []).push({}); | |
| </script> | |
| </div> | |
| <button aria-label='Close this ad' class='sticky-ad-close-button' onclick='document.getElementById('sticky-ad').style.display='none';'></button> | |
| </div> | |
| <script> | |
| //<![CDATA[ | |
| window.addEventListener("scroll",function(){ | |
| var target = document.getElementById('sticky-ad'); | |
| if(window.pageYOffset > 300){ | |
| target.style.bottom = "0"; | |
| } | |
| },false); | |
| //]]> | |
| </script> | |
| <!-- stickybodyends --> |
10. Replace Your Colored adsense Code With Your adsense code .
11. Save your Template,
Now you have Successfully applied the code to Fixed Responsive Floating AdSense Box In your footer Area in Blogger.
Now You can check your blog / website the above code is working fine for you or Not. If you are facing any issue , Please comment below i will surely help fixing the issue.
Now You can check your blog / website the above code is working fine for you or Not. If you are facing any issue , Please comment below i will surely help fixing the issue.


0 Comments:
Post a Comment